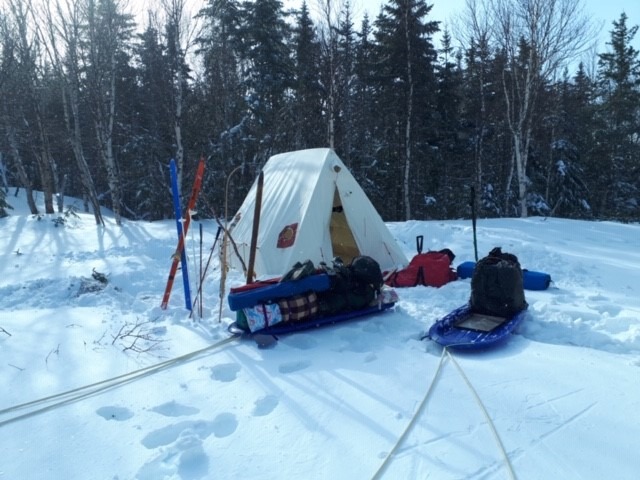
In northern countries there is a mad rush to do as much activities as possible during the summer months before the cold days of winter creep in. The problem with this approach is that you must deal with large crowds and tourists or you must journey further and tackle more difficult trips to get to a nice quiet place to camp. I am not knocking summer camping since I enjoy the warm weather however there is much opportunity for enjoyment during the winter months with a change in gear, knowledge and attitude.
So how do you go backcountry base camp ski camping? Backcountry ski base camp camping is about using skis as the primary means of transportation during winter camping. You must prepare and pack for coping with much colder temperatures as compared to summer camping. Instead of carrying backpacks winter campers often use sleds to transport their camping gear. Winter tent campers use either four season tents or a hot tent with a wood stove set up. A larger tent can be used as a home base for skiing excursions during the day.
Table of Contents
Winter Camping Gear
The Skis
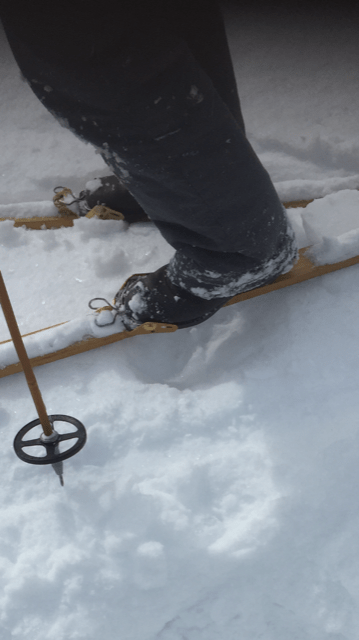
Some of the gear that we personally use for winter ski camping is of course skis. Ideally you want to purchase skis that are specifically designed for backcountry use. These skis tend to be shorter and broader in order to be more maneuverable around trees and at camp and being broader they will handle the deep snow that you will be traveling over.
What we did was to simply purchase older used cross country skis. We keep an eye open at our local second hand or thrift stores and can pick up a pair of skis and shoes for the cheap. They are not fashionable but they definitely get the job done and you probably won’t be running into any trendy skiers while camping anyway.
I have done both snowshoeing and skiing and they both have advantages and disadvantages. Unless you have a short pair of backcountry skis the snowshoes are going to be better for trudging around camp and for gathering wood. Where the skis shine is if you are traveling back and forth over established routes such as back and forth from the lake or other routes. The skis are much faster and more enjoyable in my experience and opinion (of course this is my personal preference).
The Base camp Tent
Another important piece of gear is your tent. A four season tent is much different than a 2 or 3 season tent. The difference is that its made to handle snow loads, colder temps and higher winds. Four season tents have stronger poles and they come equipped with a second wall to aid insulation. A three season tent will not protect you from blowing snow which can blow underneath your rain fly and onto your sleeping system.
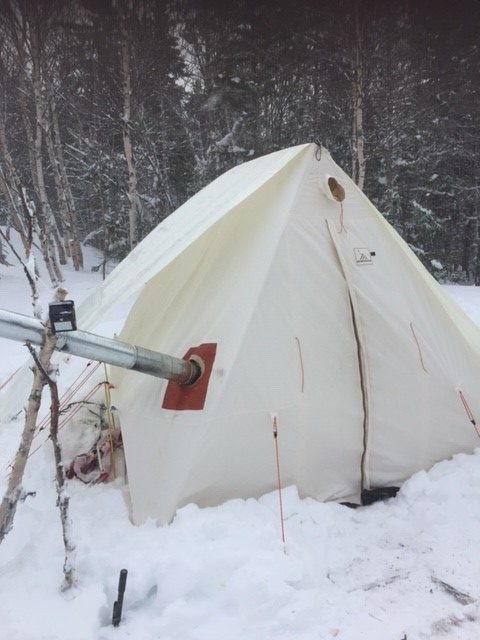
We personally make use of a hot tent with a wood stove. A wood stove makes winter camping fun. The exterior temperature can be well below zero with blowing snow but inside the temperature can be 20-25C. This goes a long way if you are spending time outside in the cold. Having a way to heat up quickly is a great plus for hot tent camping.
We personally prefer using a larger canvas hot tent. This is so we can have room to cook, sleep, stand up and stretch etc. The canvas material is an excellent insulator and is also superior to man made fabrics for winter camping when it comes to how well it breathes. This is essential to feeling comfortable in a cold and sometimes humid environment.
A canvas hot tent is also floor less so you can come and go without taking off your boots every time. We also put a tarp over the tent to help any snow slide off the roof easily. This way you don’t need to wake up at night and make sure the roof is swept clean when there is heavy snow buildup.
The Sleds
Another effective way to transport your gear over the snow is by using sleds. Ideally a toboggan style sled is the most effective way to transport your gear. You will be able to minimize having to stack your gear on the sled keeping the center of gravity low. Otherwise the gear can easily shift and the sled turn over. As well the toboggan is effective for towing in deep powdered snow. The toboggans curved front enables it to easily glide over the snow without getting bogged down.
If you are on a budget you can build your own sled. We purchased some cheap 6ft kids sleds and drilled holes for bungee chords to keep the gear in place. The only problem with the cheap plastic sleds is the front can get bogged down in heavy powder due to the pitched front end. It is not impossible to tow in deep snow but its definitely not as nice as using a traditional style toboggan but they are way cheaper to purchase.
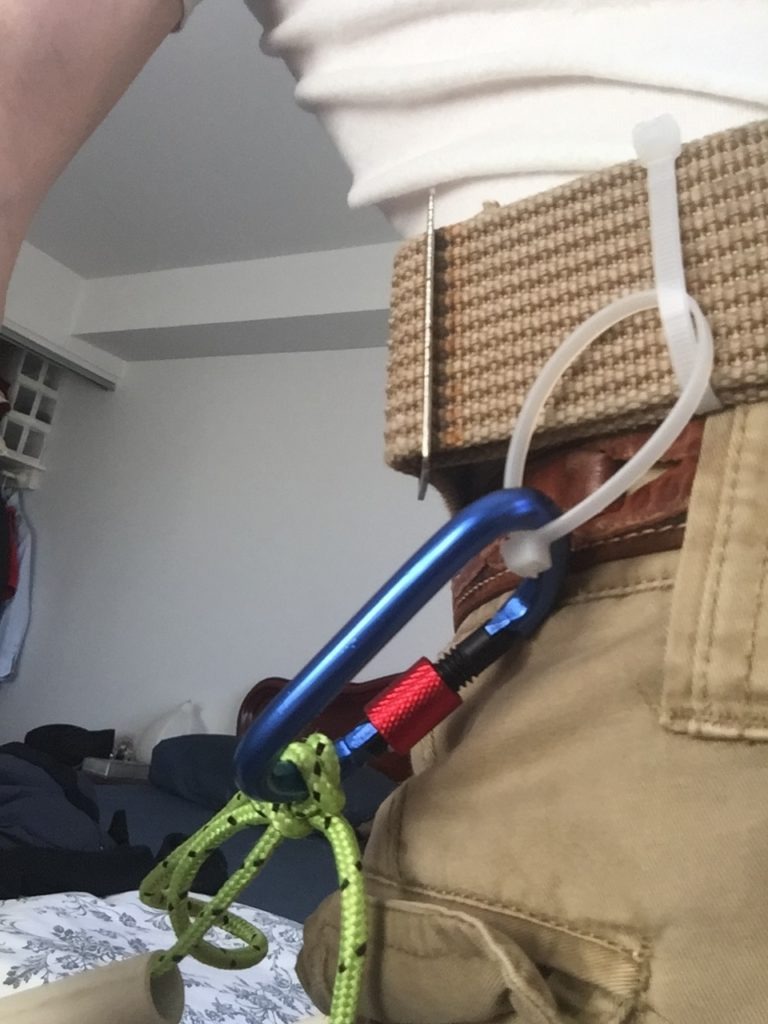
We did some research on the internet and built our own harness for the sled. We used 2 long PVC pipes and ran some rope through it. I attached some zip ties to a belt. I added some carabiners making it easy to unhitch the sleds from the belt. This set up was effective for going down moderate inclines. The PVC keeps the sled from running into your shins from behind. For steep hills we reversed the sleds and let them go first down the hill. By pulling on the correct rope you could easily (with practice) direct the sled down the hill. Crossing the PVC tubes keeps the sled behind you while going around turns and just aids overall control.
The Stove
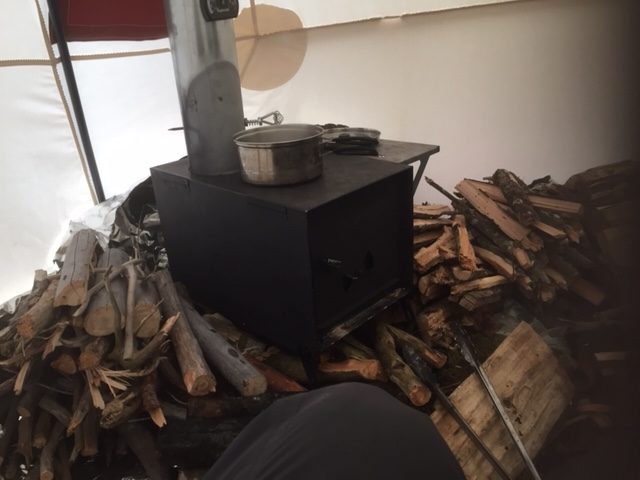
The stove that we use with our hot tent is a kni-co medium sized stove purchased through Snowtrekker Tents. It is important to purchase a large enough stove for the size tent that you purchase. You don’t want to be struggling to heat the tent up due to a stove that is too small.
Kni-co makes a reliable stove. While it does not collapse down the chimney comes apart and fits nicely inside it. I find that a plus of not having the stove collapse is that it is well sealed against any smoke escaping inside the tent.
Since the kni-co is steel it does rust. When I purchased it I sprayed it with a few coats of stove and BBQ paint. Once the paint has been cured it becomes quite tough. We cook on the stove and the paint has held up quite well. The paint has certainly protected the stove from rusting quickly.
The stove came with a side shelf. Having the one shelf is great for cooking, since you can easily move the pot onto the shelf when boiling or cooking is complete. The shelf is still close to the stove so keeps your food warm longer.
I purchased a burn meter for the stove. This has proven to be a really handy tool. It helps me easily run the stove at its optimum performance for long hot burning times.
Water Filtration System
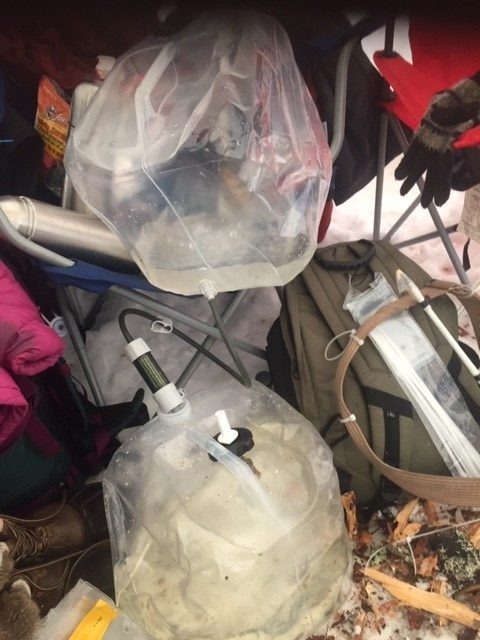
For winter camping I wanted a base camp water filtration system. I could not think of a better system for a stationary camp than a gravity filter. I looked at quite a few gravity filtration systems and settled on Miniwell. Miniwell makes a filter that comes with the filter and brass tacks parts so you can make your own DIY bag reservoir. This was a plus because many of the systems sell you a bag that is too small for what I prefer. You would need to purchase an additional bag at an additional cost if you wanted a bigger one. I had done the research on Miniwell since it is not as well known as Sawyer or Lifestraw. After doing the research I was confident that the Miniwell filter was safe to use.
I purchased two 10L collapsible containers from Canadian Tire. These worked great for the trip. I didn’t need to hang anything since the containers are both free standing. With the gravity filter we went about our daily activities and when we came home the water was all filtered. To fill the bag I needed to cut a hole in the ice with my ice chisel. We used a Ziploc bag to fill the container up with lake water.
The Axe
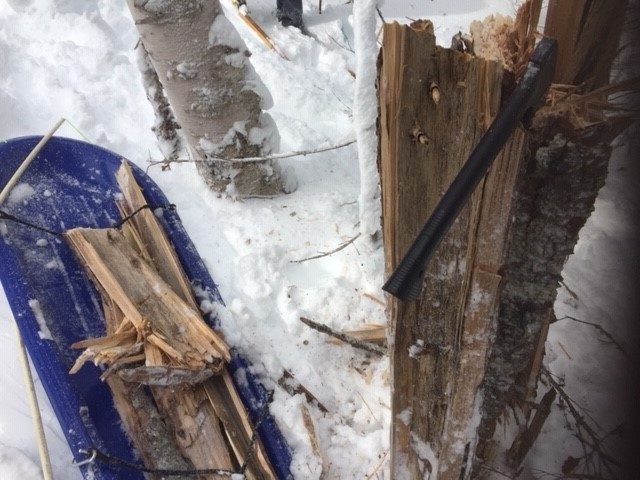
For wood processing I used two items. A small axe or hatchet and a collapsible saw. For winter wood gathering in the field I primarily used my Fiskars axe. In winter I find an axe works better than a saw when gathering wood. The wood seems to be more brittle and chips away quickly when struck. The Fiskers axe came with a sheath but no belt clip. I used a carabiner and hooked the axe onto my belt through the axe guard. This was for when wood gathering on skis I could keep my hands free.
For arm sized pieces I cut up the wood using my hand saw. This was done after bringing the wood to my camp. The axe was also useful for splitting wood into smaller pieces to aid burning.
The Knives
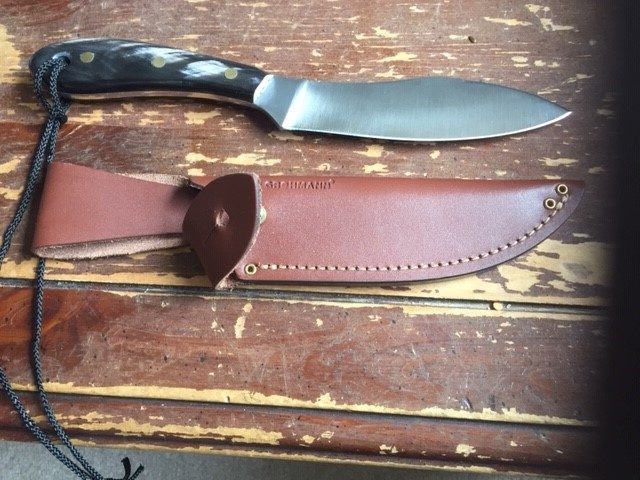
I use a multi-tool for putting together my stove chimney. It also has pliers on it for fishing use. Another knife I purchased is a fixed blade general purpose knife. It is made from stainless steel since we live by the ocean and don’t want to worry so much about maintenance (rust) as I would carbon. I opted for a large 5″ plus blade for general camp use. I do a lot of fishing so wanted a knife that could fillet large fish such as striped bass. I went with a flat grind so that the knife could be used for filleting and general cooking chores around camp.
Base Camp Sleeping Systems
We use a -18 down sleeping bag. It is a slightly tapered bag that can be joined together which works well for us. We use a couple of mummy shoulder season bags (man made fiber) as inserts. We find combining the two bags keeps us really warm. Our nights here in Nova Scotia rarely dip below -15C so our bags cover most situations. If we need additional warmth we can put on our down jackets.
We bring a wool blanket and place it on top of our bags. This absorbs the dew in the morning which can ice up the tops of our bags near our heads.
We also bring a double cot along. It does add an extra 20lb’s to our load but for winter camping it has its advantages. It elevates us above the snow and it can be easily leveled. We place coasters underneath the legs and this really does prevent the cot from sinking into the snow. On top of the cot we place our therma-rests. It is really important to sleep on top of the therma-rest since cold air comes up from underneath the cot. My wife really likes to sit on the cot vs her chair. She can also lounge around on it during the day and be off the ground. We just feel for winter camping a cot is totally worth the extra weight.
Snow Shovel
A small snow shovel is an absolute necessity for winter camping. With it you can dig out of all sorts of snow situations. The particular shovel I have is short handled and collapses down easily for storage. It has a large shovel which is great for moving large amounts of powdered snow quickly. Our ice pick came in handy when it came time to dig out our tent tie downs. If there are no trees to secure your tent to you can secure your tent to pieces of wood and bury them in snow. When it comes time to dig them out having an ice pick can make this process easier since it can be difficult if you get freezing rain or for some reason you need to go through ice. An axe would work well for this as well, however unlike an axe you don’t need to worry as much about cutting your lines accidentally with an ice pick.
Tent Lighting
When camping we make use of head lamps. We also like to try to light up the inside of our tent at night. I have a small solar powered lantern which can be hung in the tent and provides background lighting. We also purchased 2 solar powered string lights. We made sure to buy ones that have an on off power switch. These lights actually light up the tent nicely at night and make it feel more homey.
I also use a small solar powered motion light at the entrance of my tent usually mounted on a wood pole cut from the brush. This is great for when entering and exiting the tent at night. While I have a head lamp the motion light just lights up a larger area. It doesn’t take up much room or weight and we both like it. It is probably a deterrent to most animals as well since initially animals are usually scared off by bright lights.
Winter Camping Clothing
This winter we did most of our winter camping in Cape Breton, Nova Scotia, Canada. While in the highlands they can get a lot of snow the temperatures don’t get as cold typically as other areas of Canada. This year we dealt with daytime temps of around -10C to plus 3C.
The winter clothing we employed was definitely a wool thermal layer. This adds a thin layer of warm heated air around your body. We wore wool pants or polyester with one piece snow pants. The snow pants we wore even when skiing. If we got hot we just removed our upper layers until comfortable.
For the uppers I wore a 100% wool sweater over my thermal layer. On top of the wool sweater I wore a heavy fleece Hoodie that I purchased from Bass Pro. The fleece has a very thick fluffy (rough) lining which seems to mimick natural animal fur. The outside of my fleece was just smooth. This system worked great and kept me warm and dry even in wet snow. I would argue that wearing this system for active work around camp is better in some ways than wearing down.
The wool and fleece does absorb some moisture from melting snow however your body heat quickly evaporates the moisture so it never reaches your body and gets you wet and cold. To me this is the same general process that keeps animals warm and dry. A down jacket on the other hand does not breath as well. It will resist moisture for longer due to its shell, however as moisture enters your jacket it cannot evaporate as easily as with the wool and fleece combination. This is why I prefer the wool/heavy fleece combo as an ideal combination for excretive activities.
Food
Food is a whole other topic. As a general rule we don’t like to spend all our time cooking. This is what we prefer. We combine freeze dried meals with instant potatoes or rice for dinners. We find this is both satisfying and filling. We bring a lot of trail mix and bars to eat for lunch since we are usually on the move and will burn the calories. For breakfast we generally eat regular oatmeal mixed with instant oats for flavor and sweetener. I like to eat sourdough bread that has been cooked on the wood stove and covered in peanut butter or jam.
We do cook on the wood stove however for boiling water we find using a small butane stove is faster sometimes. I have a converter that allows me to use the 1L propane tanks with the smaller butane stove. If you keep an eye on the flame height (due to higher pressure) the converter works great and allows us to heat up our water even in a cold tent such as in the morning. As the tent warms up such as for dinner we switch to using butane tanks since they work fine in warmer temperatures.
Winter Wood Gathering
Wood gathering in winter can be a lot of work. It can be difficult to tell if wood is dry or wet and only until you warm the wood up do you realize you just chopped up wet wood. If you are needing to gather wood on the spot there are certain areas you can look for dry wood in the forest.
One such area is to look for large trees such as pine that have fallen over. Pine often splinters at the break point and you can often harvest dry wood from this area. You can also look for standing dead trees that are sheltered by larger trees. Sometimes there is dry wood to be found here as well.
I use a moisture meter in the winter time to check the moisture content of wood. It only works though once the wood has thawed, so I use it to sort my wood in the tent. I put the really dry wood in a pile ready for immediate burning. Another pile of semi dry wood right beside the stove to be dried. As the fire consumes the dry wood I continually rotate the wood so that the damper pieces get a chance to dry out before use. It is true that you can generally gauge dry wood without the meter but sometimes your judgement can be wrong and the meter is a last resort to checking before throwing a wet log in the stove or on the fire.
When gathering wood in the field there are a few ways to tell if wood is dry or not. First is by sight. Chop a piece of wood with the axe and if it looks wet than it probably is. When you are chopping or sawing dry wood the wood chips and sawdust appears dry and light. The saw generally moves easier when cutting dry wood and makes more of a hollow sound. The second way is to listen. Dry wood has a particular tone when struck with an axe or other piece of wood. Get to know that sound. The 3rd way to tell is the weight of the wood. If the wood feels heavier than it typically should for the species than it most likely is wet wood.
Ideally, for winter camping it is better to cut wood ahead of time and leave out to dry for later. If you know you will be returning to the same area next season cut some wood and stack it in a sheltered area ahead of time. This way it will be ready for you upon return. If you put the stash of wood in an area only easily accessible in winter than you won’t need to worry about anyone taking it in the summer time.
Backcountry ski camping can be reinvigorating. You do not need to travel very far to get a feeling of isolation and solitude. You can enjoy that cozy feeling of being around a fire and eating your favorite camping foods. Skiing or snowshoeing is great exercise and you can feel rest assured that you will return more fit than when when you left.
