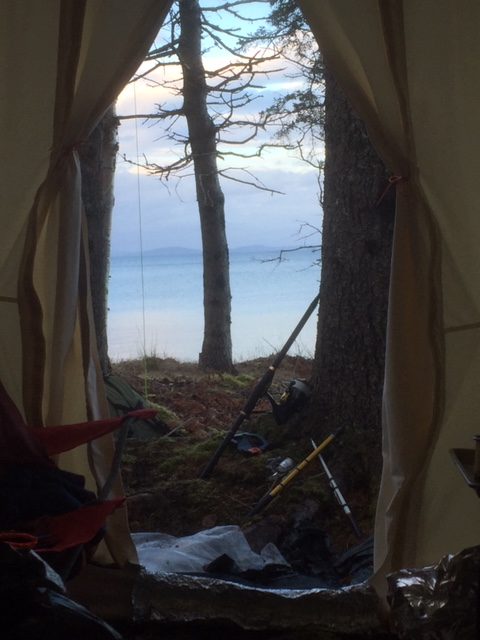
In the first article of this series I discussed how we arrived at our decision to purchase the Snowtrekker Basecamp 9.5×11 hot tent. We were planning on a winter trip in the area of Bras D’or lake on Cape Breton Island in the province of Nova Scotia, Canada. The area we were looking at was crown land and in Canada camping free on crown land is completely legal.
Before embarking on a trip to an area we had never visited before we wanted to make sure we did a trial run on setting up and running our new hot tent first. We went to visit a friend who owned a great deal of wooded land to test out our tent under winter conditions. The night we would be camping temperatures would fall to around -8 to -10C.
Table of Contents
Stove Preparation

We arrived at our friends place and the first act was for me to spray the stove with high heat black stove paint. We used rustoleum high heat stove and BBQ paint to accomplish this task. I sprayed the stove with 2 coats of paint to start. The paint seals the metal and limits the speed at which it rusts. Other options for stove care is to oil the stove before storing it. I decided on painting the stove since we would be camping near salt water and wanted to protect the stove in the best way possible. Before storing the stove I needed to vacuum the remaining ash out and I sprayed the interior with Pam to help protect the inside from rust.
Before applying the paint I cleaned the stove off with rubbing alcohol and also used steel wool to score the surface in order for the paint to adhere. I then applied the paint let it dry, then did a burn outside of the tent to cure the paint before using it inside my tent.
Sleds
I looked around for some cheap sleds for our first camping trip using the Snowtrekker. I just picked up a couple of cheap kids sleds and drilled holes on the sides to mount bungee chords for tying down the equipment. The sleds did the job and we were able to put all of our gear on the 2 sleds. The sleds were easy to pull and even though they were quite flat the bungee chords kept everything in place fairly well.
The downside of the sleds is that they have a lip that can easily get caught on any branches or when we are moving over uneven snow or ground. I will definitely invest in some long traditional style sleds for the next trip that we do. Being longer we will be able to put more equipment on the sled, not needing to stack as much making them less top heavy. Since their front lip curves back they will be much easier to pull over difficult terrain.
One of the great uses of a sled is when wood collecting. You can easily pack a lot of wood onto the sled, bungee it down and bring it out of the woods back to your camp. This is similar to using a canoe in summer to transport wood to your campsite. It is much more efficient than hauling by hand.
Finding A Good Spot To Set Up
We searched my friends property for a good flat place to set up. We didn’t have any snowshoes since there wasn’t a lot of snow on the ground when we went, so when we found the spot we didn’t really compress the ground much by walking on it before setting up. However we found it wasn’t really and issue since the snow wasn’t too deep and the snow compacted nicely from just using the space.
Arranging The Tent Space
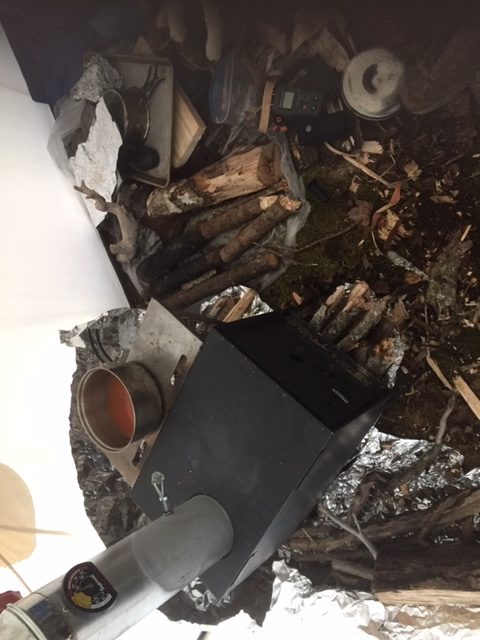
We set up the stove in the front corner of the tent. Set up 2 chairs across from the tent and placed the wood on both sides of the stove. We used a large role of tin foil that we picked up at the dollar store and placed one sheet behind the stove. We found that doing this really reflected the heat back.
We set our bedding area up at the back of the tent. I first placed a tarpaulin tarp down on the ground and folded it over. It is a fire rated tarp and it fit the tents floor space perfectly. We used work out mat interlocking foam tiles on top of the tapeline tarp. On top of the tiles we placed our thermarests and then our sleeping bags.
We used down filled 500 fill power down bags. They are rated to -18C and are rectangular in shape not mummy. So they are not exactly compact but hey its winter camping, we wanted to be warm and didn’t spend a fortune on them. These bags allow us to connect the bags together and we found that huddling together is the warmest way to sleep. We placed a wool blanket on top of the bag. We found that in the morning there was a bit of frozen condensation or dew on top of our bags near our heads. We thought that it was maybe our breath that had condensed on our bags through the night. On our real trip we pulled the wool blanket up towards the head area and we noticed that it seemed to solve the problem. Maybe the wool caught the condensation.
Running The Stove
I purchased a stove meter in order to monitor the burn temperature of my stove. The monitor worked great since I was able to run my stove at an optimum temperature so as not to burn through my wood to quickly or make the stove too hot or not hot enough so the creosote would build up.
We were able to use my friends wood which was pretty much bone dry. This made the stove burn at an optimum temperature. All in all the stove worked great. Even though the outside temperature had fallen below zero the inside temperature was comfortable. The Kni-Co stove came with a shelf that attaches to it. My wife really found the shelf a great addition for cooking.
Sleeping Overnight
We did not run the stove through the night since we would need to attend to it. Our sleeping bag was warm but we both felt that at -10C or more outside with the wind chill our bags were not quite warm enough. So for the next trip in January we decided that we would bring our summer bags and use them as liners just in case, which we ended up not needing.
Conclusion
We were very satisfied with the tent on its first test night. We are very happy that we did the initial test before going on our week long trip. We were able to try setting up the tent, which was very easy to set up. We could also work out any bugs so that we wouldn’t be faced with something unexpected out away in the wilderness. Everything went as planned though. We decided to purchase another solar powered light stringer because we liked how well lit the one we purchased worked inside of our tent. We decided on the first trip we would bring a supply of dry wood and would supplement that supply from the surroundings. I am very happy with the stove and tent and expect many years of use from them both.
Looking back we are happy that we spent the extra money and bought the Snowtrekker. I could tell that a lot of thought and effort went into making it a quality product. I am also glad that we went with the 9×11.5 Basecamp. The extra weight on sleds is not a big deal at all. Setting it up and having the extra hight and room inside made the week long trip we did very comfortable. It was just the right size for us. Im glad we did not underestimate the fact that setting up a tent easily and efficiently is really important and the Snowtrekkers design does just that. We are looking forward to the next trip in this great tent.
